
How to Install Custom HoloKote®
Return to printer solutions | Holokote
The Custom HoloKote® process can be divided into 3 steps:
When your Custom HoloKote® file is ready you will recieve confirmation by email from Magicard.
Your file will be:
- Named with your serial and a unique ID, an example below:
12345678–holokote-2rad44576765gf9382ade84739ad69452.jfif - Note the file type will now be .jfifThis file is locked to your printer serial number 🔒
(you can request the same file to be used for another of your registered printers from inside your Magicard Support Account)
*Your Windows (only) printer driver may now have access to the file, however there are many networking factors which may negate this feature which are out of our control.
The Custom HoloKote® .jfif file will also be available for you to download by logging back into your Magicard Support Account, then installing from the computer connected to your printer
Installing Custom HoloKote® into your printer
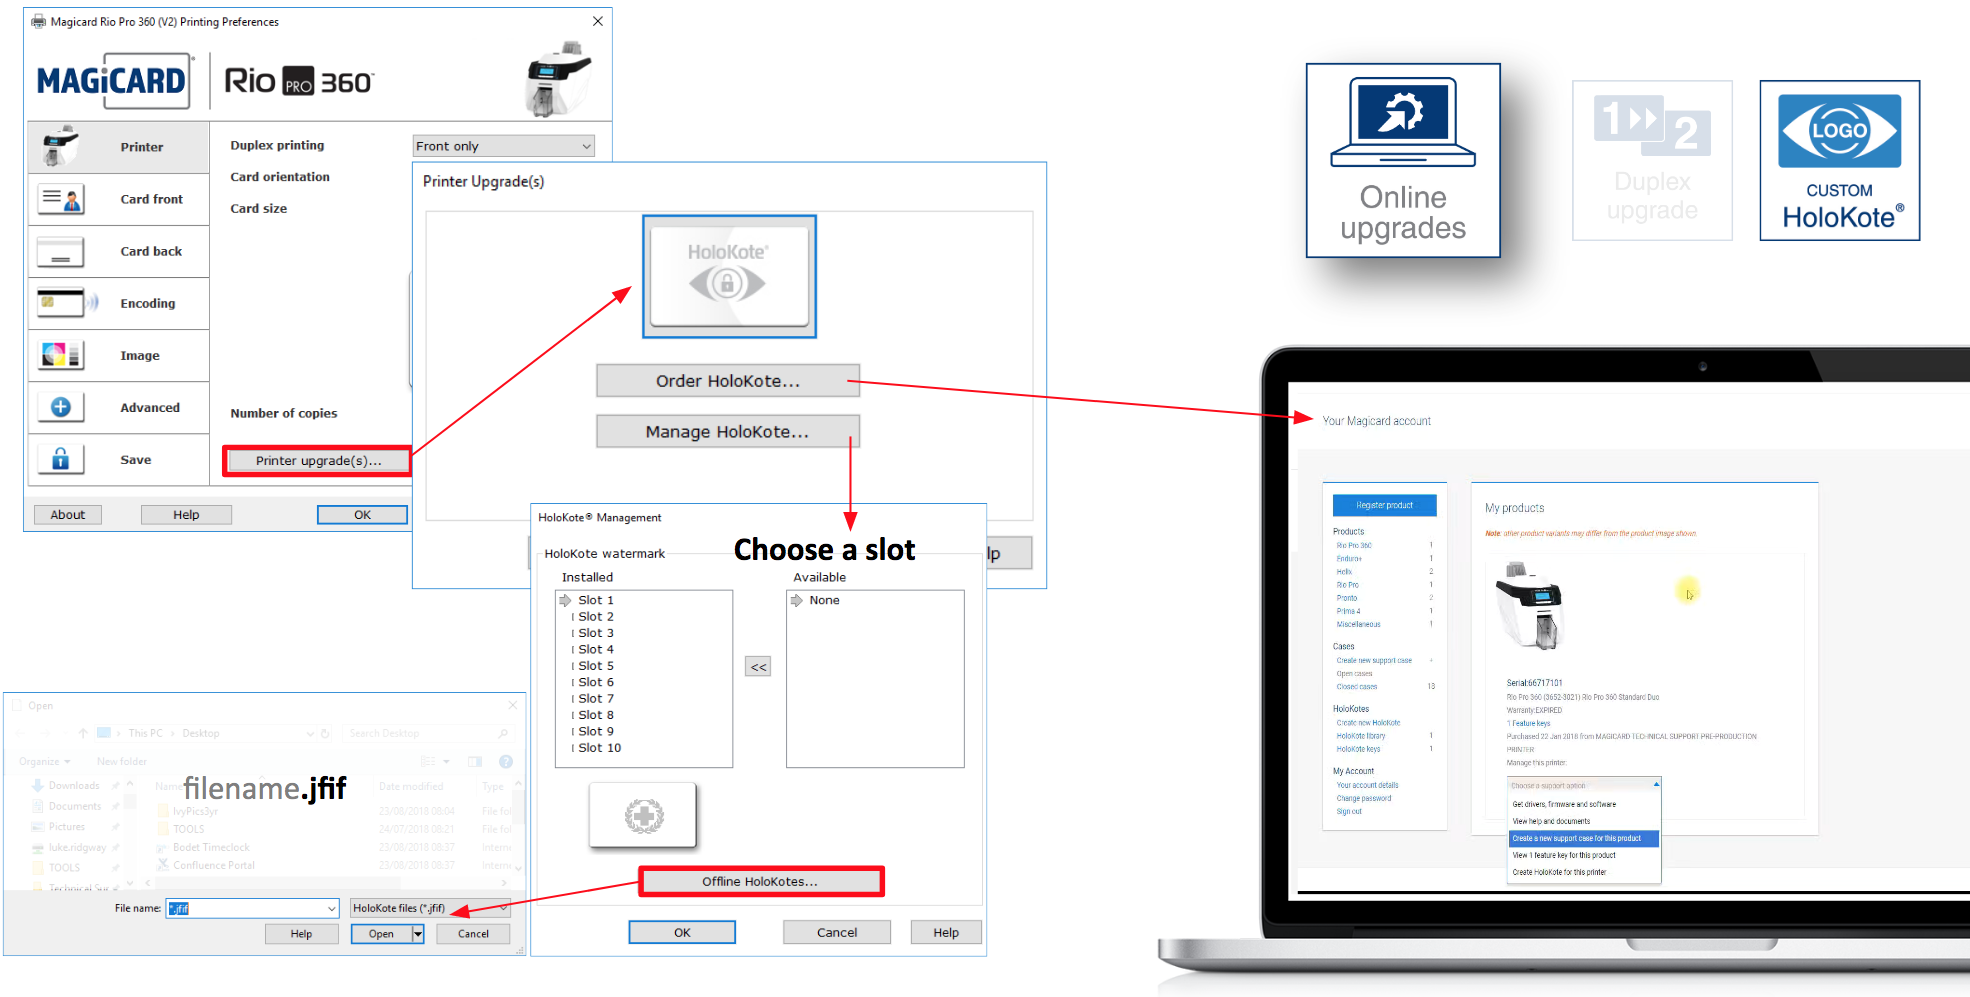
- Open your printer driver via Control Panel > Devices and Printers
- Right Click your printers icon > choose Printing Preferences
- In your Driver window select > Printer Upgrades > HoloKote®> Manage HoloKote®
- Move the ‘Available’ HoloKote® into a ‘Printer Slot’.
Your Windows printer driver (*only the Windows driver) should at this point have access to the file inside the ‘Available’ section:
> move it into your desired printer slot. Ref Choose a Slot in the image below.
However there are many networking factors which may negate this feature in the Windows driver which are out of our control.
Therefore you can dowload the Custom HoloKote® .jfif file from inside your Magicard Support Account.
> then follow the Offline HoloKote steps shown below by browsing from the driver to the download location and selecting the .jfif HoloKote® file.
> move it into your desired printer slot. Ref Choose a Slot in the image below.
HoloKote® .jfif file Installation into your printer
Click the image to enlarge ❐
Offline HoloKote®
If you have already downloaded your Custom HoloKote® File from your Support Account navigate to it from here to add it into the ‘Available’ panel on the right.
Or if your printers PC is not connected to the internet you can use a different online computer to log into your Magicard support account and download your purchased Custom HoloKote® file, then transfer it over to your printers PC via memory stick, or local network.
Choose a Slot
Your printers ‘HoloKote Slots’ are listed in the left panel. Select which slot you wish to add your Custom HoloKote® into.
Use the [<<] button to move your available Custom HoloKote® [from the right panel] over to the selected printers slot [on the left panel]
Once selected, click OK
How can I restore the original default HoloKote®?
> Simply navigate to your printers section of this website, then the HoloKote® sub-section. Or begin typing ‘Default HoloKote’ in the search to find the page.
*For Magicard 600, Magicard 300, Magicard D and Magicard K printers please refer to the Rio Pro 360 Guide below, thank you.
Please note – the video guide above has superseeded the PDF guides attached below – they remain for reference only – but following the video guide above is preferred up to date.
Global support centres
UK
Waverley House Hampshire Road Granby Industrial Estate
Weymouth, DT4 9XD
United Kingdom
USA
148 E. Stiegel St
Manheim, 17545
United States
Middle East
5WB (West Wing) Office 446
Dubai Airport Free Zone, 371564
United Arab Emirates


